Make a paper plate Easter crown
No matter how old your child is, if they are in childcare of any sort come Easter time, odds are on that you’re going to find yourself magicking up an Easter hat for the Easter bonnet parade that seems to be part of every curriculum.
Even if your craft skills aren’t of the Martha Stewart variety, never fear! We have the perfect Easter crown project that even the most DIY-challenged will be able to craft so your child can hold their head high on parade day.
What you need:
- 1 paper plate
- 1 Easter six egg printable
- glue
- scissors or a craft knife
- lead pencil
- coloured pens, pencils or crayons
Step-by-step instructions:
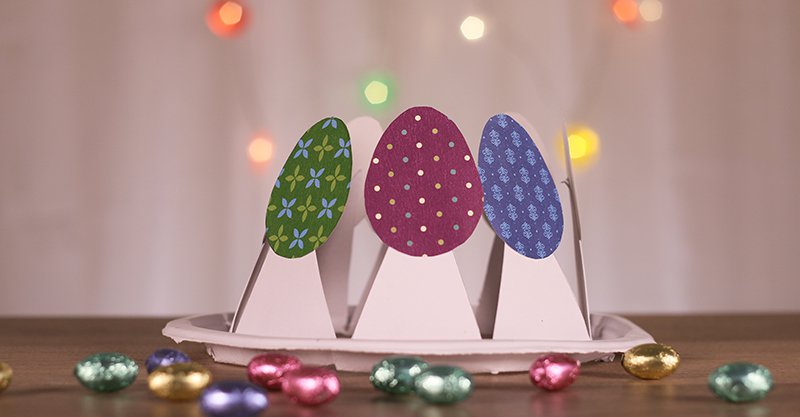
- Mark up the paper plate into eight pie-shaped segments. Now use a craft knife or scissors to cut along the lines. Start cutting about 2cm inside the plate’s rim, leaving the rim intact. Cut along each line, stopping at the rim each time.
- Once you’ve cut all the lines, you should have eight points. Bend the points upwards to form the crown.
- Download and print out the Easter egg printable on paper or white cardboard – 120gsm light card stock will feed easily through your home printer. You will need eight eggs; one for each point.
- Use crayons, coloured pencils or marker pens to colour in the eggs on the printable. Cut each egg out.
- Once your eggs are coloured and cut, glue one egg to each point of the crown.
That’s it. We’re done here. See? Wasn’t that easy?